Monday, December 10, 2012

Project #29: Style Arc Creative Cate

For the longest time, I've danced around this pattern. I'd received it as the free pattern with my first Style Arc order. I LOVE cowl neck tops and dresses, but after the disaster that was Vogue 1250 for me, I lost confidence in them. I thought, perhaps they just didn't look that good on bigger girls. So, I kept dragging out this pattern, putting it on my "to-sew" list and then putting it away again when the garment didn't eventuate.


This time, I bit the bullet, made the necessary alterations (which involved adding a significant amount at the side seams to accomodate my apple shaped body) and cut it out. I used some eggplant coloured Dry Knit that I bought in a January sale at Spotlight a couple of years ago for $2 a metre. It's perfect for a muslin. As it turns out, it's perfect for this top. The weight and drape is just right. The 'muslin' turned out so well, I wore it to work on Monday with a winter white ponte skirt that I had made earlier this year. Granted, I do work in air-conditioning so the polyester content of the fabric wasn't as bad as it could have been.

Please excuse the ridiculous look on my face. I don't even know what was going on there!

Alterations:
  • Added 1 1/2" to the side seams
  • Lengthened top by 2"
  • Lengthened sleeves by 2"
Changes for next time:
  • Widen sleeves 1"

I am keen to make up some more of this top now in some of the other knits I have hiding in my stash. It's perfect for using up smaller cuts, too. I also thought I might lengthen it to a dress to make up for my disappointment over the Vogue 1250 failure.

Not Another New Hobby?

I totally blame this on Sue. I specifically asked her to stop me from picking up a new hobby when we went to the Stitches and Craft Show! So what did she do? Dragged me along to the Jenny King Designs stall where they were displaying the most gorgeous crocheted garments I'd seen. Ever.

Technically, I guess I'm not BRAND new to crochet, so I guess purchasing the yarn and crochet hook to create a Collette Poncho wasn't REALLY taking up a new hobby. But it sure feels like it. I've taken to it with the fervour of the newly-converted. In no time flat, I'd finished my first Collette, made from Handspun Recycled Sari Silk. Of course, it's completely the wrong time to year to finish something like this (which is why I'm not wearing any make-up and my hair is having a shocker in the photos). But I can't wait to bust it out next year when the weather turns good again. ;-)

 
Then, because if I like something, then obviously everyone else will too, I made one for my work Secret Santa gift. This one, because I was operating within a strict budget is made from a cotton/viscose blend yarn I bought at Spotlight. I think I actually prefer this one, but that's more about the colour than anything else.

 
I've already bought yarn to make another one, but I think I might attempt something else first. I don't want to wear out this pattern's welcome.

Wednesday, December 5, 2012

Another Jalie Scarf Top

This one doesn't count in the Stash Garment tally, as I only bought the fabric a few weeks ago from Spotlight. Initially, I thought I might use it for my mum's Christmas top, but thought a plain one was more versatile for her. I didn't want to add this fabric to the stash, so I sewed it up at the same time as the other one. It's a thin, poly knit with a slight sheen to it. It makes a nice work top for me (only because I work in air conditioning, otherwise the polyester content would make me cook!)

I've sewn this top for me before and, other than shortening the sleeves, have made no other adjustments or changes.


Tuesday, December 4, 2012

Project #28: Sewing for my Mum


When my mum commented on my Jalie scarf collar top, a plan starting hatching in my mind. "Aha!" I thought, "There's an excellent idea for a Christmas present!" You see, my mum is a fabulous handmade-gift-recipient. She appreciates the thought, time, effort and expense because she's crafty herself.
 
I was a bit nervous with this top, though, as we are quite different in size and I didn't want to ask for measurements as that would give the game away. In the end, I just went down a few sizes from the one I normally make for myself and crossed my fingers.
I bought this fabric from The Fabric Store ages ago. It's a gorgeous colour and weight, but it gave me fits to sew. The curling at the edges was like nothing I'd ever experienced before. I conquered it with lots of pins, breaks, swearing and wine! LOL. It's much like childbirth, though, because as soon as the final stitch was in, I didn't care anymore. :-)
 
Fortunately, we celebrated Christmas early with my family so I got to see the top on. This is further proof that my mum is handmade-gift-worthy - she didn't bat an eyelid when I asked her to try it on straight away so I could take photos. LOL. She decided it 'couldn't be more perfect'. I LOVE getting gifts right! :-)

Here Mum is pretending to be a supermodel. I swear we hadn't had more than 2 wines by this point! LOL.
 The other benefit is that now I know her 'Jalie Size', I'll be able to make her a few other garments. All secret, of course! ;-)

Sunday, December 2, 2012

Projects #25, 26 and 27: Pants and Sunshine!

I wanted to make a couple of 'real' pants from my Sure Fit Designs blueprint before it got too hot. I'm not sure I got that happening in time, but at least they'll be ready for next year.

After getting a great fit on my last muslin, I followed the instructions that come with the kit and drew up a pattern for an elastic waist pair of pants. What was interesting about this exercise is comparing the fit achieved when sewing with different fabrics.

For the first pair, the chocolate brown ones, the fabric was a good weight and drape for pants, but contained some lycra. I ended up having to take these in at the sides a fair bit. I also got some wrinkles on the back which indicated to me that the back crotch length wasn't perfect. They felt comfortable, but needed a little scooping. The photos I've included here are 'pre-scoop'. They look much better now.


For the second pair, I used a linen/cotton blend (with NO stretch) which I purchased earlier this year from The Fabric Store. I LOVE this fabric and have been waiting until I got a pants pattern sorted out before cutting into it. I didn't want to waste it on yet another pants disaster. I'm happy to say, I think I managed to avoid the disaster. Interestingly with these, I didn't have to take them in at the sides, nor do I think I need to scoop the back crotch at all. I've just pinned the hem in these photos, because I just couldn't wait any longer to take photos. Rest assured, the pants are now hemmed and hanging in the guest room cupboard along with all my other clothes that are too hot to wear!

 
Coming up next with the pants pattern is adapting it to reflect some current designs. I need some new shorts and capris, so I'm endeavouring to use my SFD blueprint to get a good fit with those. I've been looking around at other patterns and RTW garments to gain some inspiration. I think I want to tackle adding some pockets, slanted ones at the front and welt ones at the back and slimming the legs down a bit. I've not sewn a welt pocket before so that will be a new skill to work on.

Project #27: Yet another Hot Patterns Sunshine Top (worn above with the linen pants)

I think this is officially my 10th rendition of this top. Even my husband recognises the pattern now, but I'm not letting that slow me down. I have some serious love for this pattern. It's the most comfortable and easy top pattern I own.

Most of the previous Sunshine tops (and dresses) I've made have been in a printed knit, with the exception of one. That plain one got flogged to death and got retired last year. I've been meaning to add a few other plain ones for ages. This chocolate brown one is the first out of the blocks. I've got another couple cut out, just need to find the time to sew them up!


And, just like that, I'm over halfway in my Stash Project misson. ! Yay!

Projects #23 and 24: Glittery and Shiny Things

The next 2 projects are going to set the world on fire with my excellent sewing skills, BUT they did the trick which was to make DD happy. I fully embraced the 'costume sewing' standard of viewing the end product in the dark while its wearer is bolting from house to house with a bucket full of lollies! Nevertheless, the fabric is gone from my stash, so it counts, right?

Project #23: The black sequin circle skirt.

Back in a former rendition of my life, I sewed quite a few circle skirts from sequin fabric for my DD's dancing school. They are super easy to make and fun to wear. Now, DD doesn't do dancing any more, but apparently, she felt the need for a black sequin circle skirt recently. It just so happened that there was a piece just large enough in the scraps bag, so the skirt was cut out.

It sat on top of the pile for a few days when, just this morning, as I was looking over the sewing list and wondering when I was ever going to find time to sew up all these planned garments, it occured to me that I had an hour before anyone else would be getting up. Perfect! I shut the doors to my sewing room so I didn't wake anyone, and stitched up the skirt in 20 minutes. Boom! One thing off my sewing list, and onto the 'Sew a Garment from Stash or Marg will Rouse' list. ;-)

Project #24: Halloween Costume - AKA The Sparkly Vampire!

For this project, I received a brief in the form of a highly detailed and labeled drawing. Items were very specific, so I didn't have much room to move. LOL. Luckily, I've trained my girl in the art of simplicity so nothing was very difficult. All fabrics came from the leftover dance fabrics I've been storing (for no particular reason).

The costume consisted of a silver sequin tunic (I used Ottobre 03-2009-32), a black tulle tutu (major usage of the ruffler foot went on with this piece, but not a lot of planning) and a sparkly red cape (essentially a giant rectangle gathered onto a piece of ribbon - easy peasy!). She wore tights with this ensemble as the skirt is scandalously short - and a bit see-through. I didn't get a picture on the night (it was dark and raining) but I promise to do better next year!

I'm counting this one as one project as there was nowhere near enough to call it three!

Saturday, December 1, 2012

{Backtracking} Project #18: A View to a TNT

My holy grail is to develop a stable of TNT patterns for all the basic garments I like to wear. Ideally, I like to have patterns for a pair of pants, a basic t-shirt, a woven shirt or blouse, a shift dress and a straight skirt.

I chose this pattern from Burda WOF (xxxx). I liked the casual feel and thought it could be a pretty versatile skirt for me. I don't really have need for a formal skirt in my line of work, and I definitely don't need one when I have my SAHM hat on, so this one was perfect.


I made it up in a super-simple-to-sew cotton with a tiny floral print that didn't require any matching at all. I was looking for the easiest project in the world. I took my time with the details, knowing that I would be coming back to this skirt over and over.


I don't know why I feel compelled to include all these photos other than they exist! LOL.
It's really hot here ATM, so you're getting no make up and frizzy hair.


For this first version, I omitted the cargo pocket. It just wouldn't have looked right in my fabric anyway. I took care to stabilise the pocket edges with fusible seam tape so they wouldn't gape. I changed the order of construction with the waistband to allow for easy alterations in the future. I used Debbie Cook's Fly Front Tutorial (which I use for every single fly front that I sew). Finally, I used a technique I learned from the Threads Insider CD to mitre the uneven corners inside the walking vents.

I'm fairly sure I would have added some extra width to the front and omitted the darts, but it was a little while ago now and I can't remember. I'll have to check the pattern when I sew up another one, because I have no doubt that there will be more.

Next time, I'll need to be sure that the waistband is snug, as this one is a little loose. It's pretty easy to take in, but it's not dire yet. I'll wait until after Christmas, I think, before adjusting any waistbands! LOL.

It sat in the wardrobe for a while because I didn't have a top to wear with it, but I bought a couple of plain t-shirts last week that work with it. So now I can at least wear it for shopping and school pick-ups. I think I need to make a better blouse to wear with it if I'm going to wear it to work.

Friday, November 30, 2012

Stash Projects #19 - 22: Summer Pyjamas

It's been a while since I've posted a proper sewn garment. I HAVE been sewing lots, but I've been finding it difficult to keep up with the photos. I took a bunch yesterday so I've got a few things to show you over the next week or so.

I've been trying to keep on track with my "50 Stash Projects" and have been fairly successful. I've been mainly sewing pretty simple garments, but they're what we need at the moment and it's still putting my stash fabric to good use.

So, when the weather turned suddenly hot here, my DD found herself without suitable sleepwear. Luckily, the stash came to the rescue...

I tried to use up all the odds and ends of fabrics, so I concentrated on making sleep shorts and paired them with RTW t-shirts. I did have visions of appliqueing wonderful designs on the tops to tie the whole ensembles together, but DD nixed that idea. So, plain tops and simple shorts it is.

I used the Ottobre "Sleep Well" pants pattern as a starting point for these shorts. I made them with a little more ease (1/2" added to each side seam), dropped the front waistband significantly (DD likes to wear her shorts under her tummy still! Toddler Style at its best!) and added a soft stretchy yoga style waistband. Obviously, I also significantly shortened the legs! LOL. I found that I had to ease the pants into the waistband a little, simply stretching it out as I sewed the two together wasn't enough.

Pattern for Shorts (Ottobre 06-2011-40):


I've made 2 pairs of shorts from this: the Yellow Polka Dot pair (#19) and the Ruffly Cupcake pair (#20). I don't have photos of those. Apparently, DD is getting reluctant to have her photo taken so I choose my battles. Simple PJ shorts isn't a battle I'm prepared to fight just yet! :-)

And, because I'm an indulgent mother, I agreed to make a set from this pretty pink/purple floral cotton which had been given to me when DD was a baby. There was just too much fabric to make just the shorts. I thought it would make a pretty blouse for DD, but she really wanted a pyjama set.

I'd already traced out the Ottobre 06-2011-39 Pyjama Top in a fit of madness, so I used that for the top and the standard shorts for the bottom.

Pattern for Top (Ottobre 06-2011-39):


All was going well with this pattern, until I attempted to put in the sleeves. They just weren't comfortable for DD to sleep in. She's normally averse to sleeveless garments, but it was the best option in this case. At first, I thought it was because DD isn't used to wearing woven garments, but I tried putting in knit sleeves, and they didn't feel any better. I think what's happened is I must have sewn the tucks a little too deep and that's added up to a narrower-than-expected front bodice. In the end, the top is working well with no sleeves, so it IS getting worn.

Here is DD in the final outcome. I had to pounce on her as soon as she got up, before she was even really aware I was taking photos. There was still some resistance, but she was too sleepy to put up much of a fuss! LOL.


Pink/Purple Pyjama Set

Tuesday, November 6, 2012

Pants Fitting: A New Video

If you recall the pants muslin I showed a few posts ago, you'll remember that the pant legs on my first muslin were swinging in towards the inseam, leaving some fairly obvious drag lines. I showed (pretty briefly) the alteration I had to make to straighten up those legs and the end result in my next muslin.
Now, I'm not one for tutorials, mainly because I have such a slapdash approach to most of my sewing, there's no real point in taking progress photos as there's no guarantee that anything will actually work out.
However, if you were interested in seeing that alteration in more detail, you're in luck! Glenda, the owner of Sure Fit Designs, has put together a video outlining the process. Just click on the picture below to watch the video. It's not that long, and she explains the alteration beautifully!


While you are there, have a poke around all the other videos that Glenda has made. There's such a wealth of knowledge available to us, it's amazing.
 
 
(Just as a disclaimer: I am not affliated with SFD in any way. I'm just a happy customer who is super impressed with the results I've achieved using their pants kit and the customer service I've received.)

Thursday, November 1, 2012

No photos this time: Regaining Focus

Just trying to gain some focus here...I went on a cutting binge last week and, so, have a few garments ready to hit the sewing machine... I am gearing up to put the nose to the grindstone today so hopefully will be able to update this list a little by tonight.

In the final stages (only need a little bit of work to finish):
  • Knit dress for MIL - DONE
  • PJ top for DD - DONE
  • Chocolate brown pants for me - DONE
Work in progress (needs a fair bit of work to finish):
  • Chocolate brown linen dress
  • {Crochet Project} Jenny King poncho - DONE
  • {Knitting Project} Tiny Tea Leaves cardigan
Currently cut out and waiting for construction:
  • Denim capris
  • Denim skirt
  • Floral skirt
  • PJ shorts (x3) for DD
  • Maxi dress for DD
  • Art Caddy (Christmas gift)
  • Purple Knit Top - Test for Vogue 8649 - DONE
  • Olive Knit Top - Test for New Look 6648
Projects which need to be cut and completed soon:
  • Jalie Scarf Top (Christmas gift) - DONE
  • Car Seat Organiser
  • Knitting bag and Needle Roll
  • Second knit dress for MIL
  • Tops to go with the pants and skirts I've been making! :-)
On the good news front, I can add to my completed stash projects tally. I sewed a Halloween costume for DD totally from stash. No pictures, though. What kind of mother sews her daughter a cute Halloween costume, decorates the house even, and doesn't take any photos at all?

Tuesday, October 16, 2012

Returning to Pants Fitting: It's a Win!

With summer fast approaching, I need to restock my wardrobe with shorts and capris. I'm certainly not adverse to skirts and dresses, but I do feel more comfortable in pants.

 And so, I've returned to the Sure-Fit Designs pants blueprint. I was pretty happy with the first muslin that I made from this pattern, but the legs weren't hanging straight.


So, today, I made an alteration to my first version and sewed up another test pair. Amazingly, I think they are almost perfect. One leg has just the tiniest wrinkle - perhaps I need to let out the inseam on that side only - just a small amount, but at least then both sides would look the same.

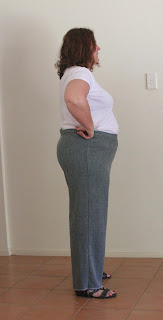
(Warning: These are not the most flattering shots ever, but I thought they might be helpful to some other plus-sized girl struggling with getting pants to fit properly.)


To make the alteration, I measured down 2" from the crotch seamline and drew a line straight across my pant leg (on both front and back pieces). This line was perpendicular to the grainline. I then cut along that line, leaving a hinge on the inseam seamline. I overlapped these 2 edges at the side seam by 2", which blended to nothing by the inseam. I figured out how much I needed to overlap by trying on my first muslin and pinning out the wedge. I just measured how much I had to pin out to get the legs to hang straight and transferred this to my pattern.

First muslin with proposed alteration pinned out: Front

First muslin with proposed alteration pinned out: Back


For my first 'real' pair of pants, I'm going to just add a fraction of an inch to the side seams from the hip up as the side seam looks as though it's pulling slightly to the back. I'll also add some length to the leg. They are almost the perfect length now, without having taken up any hem at all. This means I need to add a hem allowance to the current pattern. Not a big deal.

Can I just point out that this fit was achieved by the second muslin? That is outstanding, and I'm totally sold on the Sure Fit Designs system. I've got the dress kit and am now super keen to try that one. It might take a little while, though, because I'm going to be busy sewing up some new pants!

Thursday, October 4, 2012

Back on Track: Projects 16 & 17: One 4 All Stylish Swimsuit (Frilly)

Seeing as though I've got a sewing list a mile long for this summer, I thought I'd best get moving on it, starting with the easier garments first. Obviously, that involves sewing for my daughter as there is little fitting involved.

First up, she desperately needs some swimsuits. I'd purchased this downloadable pattern a little while ago on Etsy, and we were both keen to test it out. The fabric I used for the test garment (I've yet to get pictures on DD) was part of a bulk lycra buy-up several years ago from Make It Fabrics in Brisbane. DD informed me that she didn't like it as I was cutting it out. Luckily that tune changed because I'm pretty happy with the end result.

 
I used the ruffler foot to gather up all that green lycra. I set it to maximum rufflage for a super frilly look. The skirt ruffle was just over 2 widths of fabric. It gives the skirt a nice weight. I'd like to try a suit with a less frilly frill.

Here you can see the little pants under the skirt. Cute!

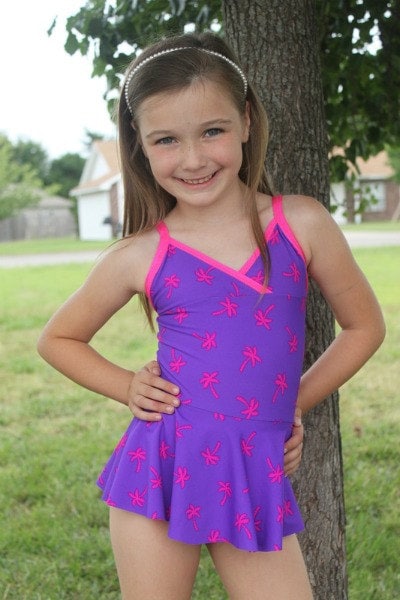
The pattern comes with more than 4 different variations.There are two different size ranges. We ended up with the 6 - 16 sizes. DD chose the suit which included an overskirt. She did check the pattern photos a few times to make sure I hadn't sewn it wrong, so luckily the final result looks pretty similar to the front of the pattern!

The writer of the pattern also has a blog where she has shown lots of different versions of this pattern.
One 4 All Stylish Swimsuit (Link to Etsy store)

As far as the pattern goes, it was pretty good, but there was some funky drafting, particularly with the skirt pieces not joining up properly in the pattern stage. I'd say that was more to do with digitising the pattern, rather than poor drafting.

The instructions were fairly good, but there were a few spots where I was glad I had some swimsuit sewing experience already. I think the pattern needed a little more testing/proofreading, but all-in-all, it's a gateway to a really cute swimsuit. DD has already picked out the fabrics for her next two, so that must mean it's a winner.

The fit was good. I have lengthened the body by 1/2" for the next pair.

Look, I've even managed to get photos on DD, and an action shot!


They performed well during this afternoon's swim and DD has already chosen the fabric for another 2 swimsuits. This time, though, she doesn't want the ruffles! Looks like I'll have to put my ruffler foot away again. :-)
 
I've also finished a 2-piece Kwik Sew set, but it's too big, so has been put away for next year. I've got to trace out the smaller pattern tomorrow and have another go. Stay tuned for more swimsuit action!


Thursday, September 27, 2012

More Sewing Plans for Summer (or the value of teaching your child to budget)

Yesterday, I had the glorious experience of shopping for my daughter's summer wardrobe.

In preparation for this expedition, on Tuesday, we dragged out all her summer clothes that had been stashed in various locations around the house for the cool period we get in Queensland. A mammoth trying-on followed, accompanied by moans and groans and exclamations of boredom. My daughter handled it really well, though! ;-)

It seemed as though she had grown out of nearly everything she owned. Great.

Anyway, in the interests of teaching her how to cultivate a workable, affordable wardrobe, we made a list of what she had and what she needed for the summer ahead (which, just quietly, seems to have arrived here already).

We also perused the fabric stash, and went through the pattern collection..just to get an idea of what she liked and what was possible with no expense.

Armed with our information, we braved the shops. She was SO EXCITED ... for about 30 minutes. Then it became a drag. I set her a budget of $200 to cover everything she needed - tops, shorts, skirts, swimsuits, rash shirts, PJs, shoes, accessories...everything. We talked about how to get the best value for your money and how budgeting is not evil. If you manage your money wisely, you can have the things you want guilt free. How good is that? I also may have mentioned that items sewn by Mum from stash were free. Any fabric purchased would have to come from her budget, but labour would be paid for with love (and cups of coffee!). She seemed to think that was a good deal. Not bad for a 9 year old.

In the end, she handled the whole experience admirably well. She concentrated on looking for things she knew I couldn't really replicate (things with prints and foil transfers, etc) and ended up with enough money to buy her ABSOLUTE FAVOURITE DRESS EVER from Pumpkin Patch (which I didn't have the heart to tell her I could make for a lot less - it's pretty simple). She was happy and so was I. That, my friends, is a great shopping trip.


The.Best.Dress.Ever :-)

Of course, I now have a few more items to add to my summer sewing list. But, on the upside, I get all my coffees made for me for the next week and a bit while we're on school holidays.

Just so I don't forget what I've promised to make, here's a list:
  • Black sequin circle skirt
  • Several sets of summer pyjamas
  • 3 or 4 swimsuits (we have a pool)
  • 1 maxi dress
  • Black drapey bolero (based on the hot pink one she already owns)
  • 2 everyday skirts
  • 1 dressier skirt (glittery denim)
  • 2 everyday shorts
  • Black capris/long shorts
I'm fairly certain that I have the fabric to sew a few things from this list, otherwise there'll be a quick trip to The Fabric Store in my future.

Tuesday, September 18, 2012

The Green Silk Dress - Done and Dusted

Well, finally the wedding day has been and gone. I'm happy to say the dress got finished on time and there were no wardrobe malfunctions. Yay!

First up, here are the pictures...


And some stats:

Pattern: Burda WOF 12-2008-136B
Fabrics: Green/black shot silk and black silk organza for underlining (from The Fabric Store in Brisbane), Black sheer nylon/velvet overlay (from Lincraft many years ago).

I had been eyeing off this pattern for quite some time. I really liked the overall shape and the idea of the split overlay. It looked really elegant in the magazine.


Pattern alterations/Design Changes:

First, I (with the help of my sewing teacher) tissue fitted the pattern to my body. This particular pattern allows for a smaller waist and curvy hips - the total opposite of my body. I didn't want anything really tight, so we ended up adding a fair bit to the front skirt section and straightening out the side seams to create more of an a-line shape.

I also had to do a full bicep adjustment for the sleeves and I ended up lengthening them a little. The rest of the pattern worked fine for me.

Before cutting into the silk, I made a test version of this dress in a chocolate brown linen (I'll post pics of that one when I've completely finished it). Obviously this was without the overlay, but gave me a good idea of the overall shape and pattern alterations needed. I ended up taking out a fair bit of the extra room we added in.

Construction notes:

Putting together the linen version was fairly straight forward. I learned how to insert an invisible zip across a seam so that it all lined up perfectly. I also learned how to trace out my seam lines so that I could see where I made fitting changes, making it easy to transfer those to my pattern. I bound the seams in this version with a lightweight poly-cotton.

It was when I changed to the silk version of this dress that my nightmares began. If I'd known before I started just how tricky this dress was going to be, I would never have started. Granted I learnt a LOT while sewing this dress, but I'm the queen of simple and easy. I'm really happy to stay in my comfort zone and have no need to push myself to learn new things just for the sake of it. I felt as though this dress looked WAY too simple for the effort and time that went into it. I won't be making it again. I may make a dress using the pattern, but the layered look won't ever cross my machine again. The worst part was that point in the centre front where you had multiple seams and layers all needing to meet in a perfect point. I'm just too slap happy to end up with a perfect result, but it was really important this time. Just that tiny bit took me several days to finish. I think I must have unpicked it at least a dozen times. In the end, I was happy with it, but we ended up adding a simple bow anyway!

Finally, here's a photo of the flowergirl dresses in action...infinitely cuter than mine ;-)

Wednesday, September 5, 2012

Just a quick update

There is just over a week until my brother and his fiance get married. Fortunately, my daughter's flowergirl dress is finished (insert happy dance emoticon here!), her shoes are purchased and I've booked a mani/pedi for her with one of my friends who is a beauty therapist. So she's happy...

We took some preliminary shots this morning, just to make sure everything is how it is meant to be.


The ankle bracelets are going before the big day!


She feels pretty special. These are her first pair of 'heels'. We have plans to practise walking in them this week.

The dress for my niece has been received and deemed appropriate! Yippee! (And, it seems I've been a bit remiss, counting my niece's dress in my 50 Projects tally. What was I thinking? The fabric for these 2 dresses didn't come from stash, so I'll have to go back and change that.)

So the only thing that needs to be done is my dress. Contrary to all accounts, there IS progress being made. Just today I trimmed up the side seam allowances and neatened them. Up until this dress, I think I'd been taking my overlocker for granted. It's so time consuming when you can't serge seam allowances!

I've still got a fair bit to do, but I'm quietly confident that it will get done in time. After all, it's actually looking a bit like a dress now, rather than chunks of fabric.

Saturday, August 18, 2012

Project 16: Flowergirl Dress #1

I'm quite excited. I got the first flowergirl dress done and in the post yesterday. But I totally forgot to take pictures of the finished garment. Oh no! All I've got are these progress pics where I was checking with my SIL that she liked the trim.

Here the trim is just pinned on. The hem of the underskirt is stitched, but the chiffon overlayer hasn't been hemmed yet.


Stats:
Pattern: Ottobre 02-2005-11. Obviously, I've lengthened it to make a dress, but I've also made a couple of other changes. Instead of running a couple of rows of shirring thread at the underbust, I created a seam which I pressed up and topstitched, creating a casing for some 1/4" elastic. I also added quite a bit of width to the bodice, skirt and sleeve pieces to create extra gathers and volume.

I've forgotten what size I made (I think it's probably around the 110 mark). I'm putting this down to me working on 4 projects at once!


Fabrics:
Considering we were working on a budget AND the girls will only wear these dresses once or twice (at the most), price was one of the most important factors in selecting the fabric and trims. The dress is a polyester satin, with a polyester chiffon overlayer. The sequin trim is stretchy which means I didn't have to insert a zip. The fabrics were purchased at EastCoast Fabrics and the trim at Spotlight.

Notes:
This is the first time that I can recall working with chiffon and I was a little apprehensive. I used the gelatin trick suggested to me by margk and it worked like a dream. Before sewing, I hand basted the chiffon to the satin pieces for the bodice and the sleeves. Because I was working on two dresses which aren't too dissimilar in size, I used different colour basting thread for each girl so I wouldn't confuse the pieces. I left the skirts separate.

To hem the satin, I overlocked the edges (I wasn't being too precious about couture sewing techniques on these dresses!) because they were unravelling like crazy, then turned and stitched a tiny hem. I then turned and stitched a tiny hem again so you couldn't see the overlocking. I roll-hemmed the chiffon skirt. It was really hard to get the skirts exactly the same length all the way around, but I figure the girls are going to be mostly on the move, so hopefully no-one will notice. ;-)

Next up, I have to finish both my daughter's flowergirl dress and MY dress for the wedding. I've got 27 days. Time to get off the computer and get sewing!

Saturday, August 11, 2012

Plans for the next season

One of my favourite aspects of this hobby is the planning. I love putting together fabrics and patterns and wardrobe plans. Sometimes I even follow them!

At the moment, I'm currently working on FOUR projects! I'm sewing a fair bit each day, but because it's spread across 4 projects, it sometimes feels like I'm not making any progress. At least they'll all be finished about the same time. Bring on the wedding!

Anyway, I've started thinking about what I'm going to create after I've finished the wedding sewing. I've put together a small storyboard for the first step of my Spring/Summer plans.


I'm want to build a wardrobe based around chocolate brown and aqua as I have quite a lot of those colours in my stash. The storyboard fits the Mini-Wardrobe Contest requirements on PR, but I don't know if I'll enter that one. I am usually quite short on time in September and this year won't be any different. Nearly all of the patterns I've chosen are new to me, too, so that'll require a bit of fitting time.

Hopefully, these plans will give me the push to finish up the dresses I'm working on. I'm getting quite excited to start sewing these fabrics. I love working with linen.

Friday, August 3, 2012

Project 15: Cardigan


This one was to be my final project for the PR Pattern Stash Contest, although I didn't end up entering it. I had it finished in time, but I didn't really like it and I couldn't muster the enthusiasm to photograph and review it. However, I've pushed through the laziness and am reviewing it now.

This is the cardigan from McCalls 5890. I really love the look of the coordinated wardrobe that this pattern offers and have long admired the simple lines of the cardigan. So, I busted out this pattern for the Pattern Stash contest and merrily set off on my cardigan journey.


 I soon came to grief, however, when I realised that the wrong side of the fabric was going to show for the shawl collar. That, in itself, wasn't too much of an issue with the fabric I'd chosen, but how on earth was I going to finish the edges on the thing? I'm not much one for the deconstructed look of leaving edges unfinished, but I was leaning towards it for this project. It made me feel quite uncomfortable. It also brought all my sewing to a halt while I came to terms with my discomfort. I procrastinated on this one like crazy! LOL.

In the end, I madly consulted all the previous reviews of this pattern on PR (which I probably should have done BEFORE I started, but, hey, you live and learn, right?). There were a few different methods used by previous reviewers. I chose to cut off the selvedge of my fabric and stitch it to the front edges because it was such an unusually pretty edge. I also trimmed the sleeve hems with the selvedge as well but you can't see it in the photo of me wearing it because I've got the sleeves rolled up. There's still the problem of the wrong side of the hem showing at the bottom of the shawl collar. While it's not that noticeable in this fabric, I just found the whole thing very clumsy.

The fit of the cardigan was fine, if a little big, but the business over the right side/wrong side dilemma has put me off sewing this pattern ever again. I have plenty of other cardigan patterns in my stash that have a far more elegant treatment of that front collar/edge.


What's in the pipeline now?

Currently, I have four garments in active progress: two flowergirl dresses, my brown linen dress (which is a test version of my silk dress) and the green silk dress for my brother's wedding.


Sneak peek of the brown linen dress.


I've started putting together a plan for Spring/Summer sewing and am thinking that I would like to base it around the colours of chocolate, aqua and white. I'm putting together a storyboard of my ideas and will post it here when I'm done.

Thursday, July 19, 2012

Project 14: Jalie Scarf Top


I've been wanting to make this one up for years. Finally, I've managed to get it sewn up.


My reservations with the scarf collar top were that I hadn't seen it made up too many times for a plus sized body. I also know that Jalie runs small, particularly in the sleeves. This pattern was no different. However, a combination of it being a knit pattern and my increasing confidence , meant that the pattern alterations weren't too arduous.

My measurements put me squarely in the DD size range (with the exception of my waist, but I expected that). However, when I compared the flat pattern measurement to an existing garment with the fit I like, I realised I was going to need to add some serious width. I'm sure the pattern would have "fit" me if I hadn't added to the side seams, but it certainly wouldn't have had the ease that I like.

The {fit} alterations I made were:
  • Traced the DD size for the neck, shoulders and most of the armscye.
  • Extended the bottom of the armscye out to the FF size (the "cheater" FBA)
  • Added another 1" to the bottom of the pattern, blending it into the FF side seam just before the armscye.
  • Lengthened the pattern at the hemline by 3" (I did that for this top. I may or may not do that for others.)

I loved the method they used for attaching the scarf collar. However, like one previous reviewer on PR, I didn't leave the scarf open at one end for turning through, I just left a gap partway up one of the sides. I closed that up with a ladder stitch and am happy with that decision.

I used a very drapey rayon/lycra knit called "Letters from Venice", that I bought it a fair while ago from Catherine's Place. They still have some in stock, but it's a lot more expensive than what I remember paying for it. I bought it as part of a co-op buy.

Seeing as though I stitched the main part of this top up at my sewing lesson, I used my sewing machine for the majority of the work. (I couldn't be bothered carting my overlocker in to class.) I have to say it's been a loooooong time since I've sewn knits on a sewing machine. It's sooooooo slow! But it did the trick. I waited until I got home to do the hems on the coverstitch machine.

 I'm happy with the fit in the back. It's got some shape but doesn't cling. 

Overall, I'm very happy with this top, and can see several renditions being added to "The List". It's a very quick sew.