Saturday, August 18, 2012

Project 16: Flowergirl Dress #1

I'm quite excited. I got the first flowergirl dress done and in the post yesterday. But I totally forgot to take pictures of the finished garment. Oh no! All I've got are these progress pics where I was checking with my SIL that she liked the trim.

Here the trim is just pinned on. The hem of the underskirt is stitched, but the chiffon overlayer hasn't been hemmed yet.


Stats:
Pattern: Ottobre 02-2005-11. Obviously, I've lengthened it to make a dress, but I've also made a couple of other changes. Instead of running a couple of rows of shirring thread at the underbust, I created a seam which I pressed up and topstitched, creating a casing for some 1/4" elastic. I also added quite a bit of width to the bodice, skirt and sleeve pieces to create extra gathers and volume.

I've forgotten what size I made (I think it's probably around the 110 mark). I'm putting this down to me working on 4 projects at once!


Fabrics:
Considering we were working on a budget AND the girls will only wear these dresses once or twice (at the most), price was one of the most important factors in selecting the fabric and trims. The dress is a polyester satin, with a polyester chiffon overlayer. The sequin trim is stretchy which means I didn't have to insert a zip. The fabrics were purchased at EastCoast Fabrics and the trim at Spotlight.

Notes:
This is the first time that I can recall working with chiffon and I was a little apprehensive. I used the gelatin trick suggested to me by margk and it worked like a dream. Before sewing, I hand basted the chiffon to the satin pieces for the bodice and the sleeves. Because I was working on two dresses which aren't too dissimilar in size, I used different colour basting thread for each girl so I wouldn't confuse the pieces. I left the skirts separate.

To hem the satin, I overlocked the edges (I wasn't being too precious about couture sewing techniques on these dresses!) because they were unravelling like crazy, then turned and stitched a tiny hem. I then turned and stitched a tiny hem again so you couldn't see the overlocking. I roll-hemmed the chiffon skirt. It was really hard to get the skirts exactly the same length all the way around, but I figure the girls are going to be mostly on the move, so hopefully no-one will notice. ;-)

Next up, I have to finish both my daughter's flowergirl dress and MY dress for the wedding. I've got 27 days. Time to get off the computer and get sewing!

Saturday, August 11, 2012

Plans for the next season

One of my favourite aspects of this hobby is the planning. I love putting together fabrics and patterns and wardrobe plans. Sometimes I even follow them!

At the moment, I'm currently working on FOUR projects! I'm sewing a fair bit each day, but because it's spread across 4 projects, it sometimes feels like I'm not making any progress. At least they'll all be finished about the same time. Bring on the wedding!

Anyway, I've started thinking about what I'm going to create after I've finished the wedding sewing. I've put together a small storyboard for the first step of my Spring/Summer plans.


I'm want to build a wardrobe based around chocolate brown and aqua as I have quite a lot of those colours in my stash. The storyboard fits the Mini-Wardrobe Contest requirements on PR, but I don't know if I'll enter that one. I am usually quite short on time in September and this year won't be any different. Nearly all of the patterns I've chosen are new to me, too, so that'll require a bit of fitting time.

Hopefully, these plans will give me the push to finish up the dresses I'm working on. I'm getting quite excited to start sewing these fabrics. I love working with linen.

Friday, August 3, 2012

Project 15: Cardigan


This one was to be my final project for the PR Pattern Stash Contest, although I didn't end up entering it. I had it finished in time, but I didn't really like it and I couldn't muster the enthusiasm to photograph and review it. However, I've pushed through the laziness and am reviewing it now.

This is the cardigan from McCalls 5890. I really love the look of the coordinated wardrobe that this pattern offers and have long admired the simple lines of the cardigan. So, I busted out this pattern for the Pattern Stash contest and merrily set off on my cardigan journey.


 I soon came to grief, however, when I realised that the wrong side of the fabric was going to show for the shawl collar. That, in itself, wasn't too much of an issue with the fabric I'd chosen, but how on earth was I going to finish the edges on the thing? I'm not much one for the deconstructed look of leaving edges unfinished, but I was leaning towards it for this project. It made me feel quite uncomfortable. It also brought all my sewing to a halt while I came to terms with my discomfort. I procrastinated on this one like crazy! LOL.

In the end, I madly consulted all the previous reviews of this pattern on PR (which I probably should have done BEFORE I started, but, hey, you live and learn, right?). There were a few different methods used by previous reviewers. I chose to cut off the selvedge of my fabric and stitch it to the front edges because it was such an unusually pretty edge. I also trimmed the sleeve hems with the selvedge as well but you can't see it in the photo of me wearing it because I've got the sleeves rolled up. There's still the problem of the wrong side of the hem showing at the bottom of the shawl collar. While it's not that noticeable in this fabric, I just found the whole thing very clumsy.

The fit of the cardigan was fine, if a little big, but the business over the right side/wrong side dilemma has put me off sewing this pattern ever again. I have plenty of other cardigan patterns in my stash that have a far more elegant treatment of that front collar/edge.


What's in the pipeline now?

Currently, I have four garments in active progress: two flowergirl dresses, my brown linen dress (which is a test version of my silk dress) and the green silk dress for my brother's wedding.


Sneak peek of the brown linen dress.


I've started putting together a plan for Spring/Summer sewing and am thinking that I would like to base it around the colours of chocolate, aqua and white. I'm putting together a storyboard of my ideas and will post it here when I'm done.

Thursday, July 19, 2012

Project 14: Jalie Scarf Top


I've been wanting to make this one up for years. Finally, I've managed to get it sewn up.


My reservations with the scarf collar top were that I hadn't seen it made up too many times for a plus sized body. I also know that Jalie runs small, particularly in the sleeves. This pattern was no different. However, a combination of it being a knit pattern and my increasing confidence , meant that the pattern alterations weren't too arduous.

My measurements put me squarely in the DD size range (with the exception of my waist, but I expected that). However, when I compared the flat pattern measurement to an existing garment with the fit I like, I realised I was going to need to add some serious width. I'm sure the pattern would have "fit" me if I hadn't added to the side seams, but it certainly wouldn't have had the ease that I like.

The {fit} alterations I made were:
  • Traced the DD size for the neck, shoulders and most of the armscye.
  • Extended the bottom of the armscye out to the FF size (the "cheater" FBA)
  • Added another 1" to the bottom of the pattern, blending it into the FF side seam just before the armscye.
  • Lengthened the pattern at the hemline by 3" (I did that for this top. I may or may not do that for others.)

I loved the method they used for attaching the scarf collar. However, like one previous reviewer on PR, I didn't leave the scarf open at one end for turning through, I just left a gap partway up one of the sides. I closed that up with a ladder stitch and am happy with that decision.

I used a very drapey rayon/lycra knit called "Letters from Venice", that I bought it a fair while ago from Catherine's Place. They still have some in stock, but it's a lot more expensive than what I remember paying for it. I bought it as part of a co-op buy.

Seeing as though I stitched the main part of this top up at my sewing lesson, I used my sewing machine for the majority of the work. (I couldn't be bothered carting my overlocker in to class.) I have to say it's been a loooooong time since I've sewn knits on a sewing machine. It's sooooooo slow! But it did the trick. I waited until I got home to do the hems on the coverstitch machine.

 I'm happy with the fit in the back. It's got some shape but doesn't cling. 

Overall, I'm very happy with this top, and can see several renditions being added to "The List". It's a very quick sew.

Tuesday, July 17, 2012

Slight Stumble

Oh dear, I've had a small fall from the fabric diet wagon.

I had to go into The Fabric Store this morning to buy some suitable fabric for the dress I'm making for my brother's wedding.

The good news is that I found the perfect fabric and they were having a 40% off VIP sale.

Here it is under the {stash} fabric I wanted to use as an overlay.

The bad news is that they were having a 40% off VIP sale and an additional 4 pieces of fabric followed me home.

Here's the guilty evidence...


I'll continue to try hard to stick to my "50 Projects" goal. I'm still finding it motivating. Obviously, it didn't stop me from buying more fabric today, but I AM sewing more as a result of the goal, so that's got to be a win!

Saturday, July 14, 2012

Project 13 of 50: Farbenmix Quiara


This is a TNT pattern for my daughter. She really loves the double sleeve and it's fabulous for using up little bits of leftover knits. I've made this pattern up several times before in both the t-shirt and the hooded tunic versions.

Farbenmix Quiara
This particular version is a bit special, though, because we've used some fabric (the striped knit) gifted to DD by my fabulous sewing cousin. It was a remnant that DD spied in the scraps box in her sewing room! Due to the economical nature of sewing for children, this t-shirt won't be the only project that incorporates this fabric. We've got a skirt planned for the rest.

The black cotton lycra was also a leftover scrap from a previous project, making this t-shirt virtually free! Yay!

I've found this pattern to be sized really well. I sewed a 134/140 for DD who is 136cm tall. She ordinarily wears a 128 for top garments and a 134 for bottom garments. The shoulders sit a little off the joint for this, but it's a t-shirt and I'm not going to be too fussy.

It was completely constructed on my overlocker/coverstitch machine.

Sadly, this garment isn't eligible for the PR Pattern Stash Contest as I've used this pattern before. However, the skirt that is next up in the queue for DD uses a pattern I've been meaning to make up for years!

Thursday, July 12, 2012

Project 12 of 50: Dressing Gown

PR Pattern Stash Contest Entry #1

Butterick 5537: Dressing Gown


Review is here.


Man, this project has been one huge mojo sucker! I don't know why. Maybe because I normally shy away from anything competitve and, while I don't have any illusions about winning the PR Pattern Stash Contest, in my mind, it's still a competition.

I keep coming up with all these projects that need to be sewn NOW - and none of them qualify for the contest. LOL. Or maybe, I'm just resisting sewing up the patterns that I've been avoiding for so long?

Anyway, I've had heaps of time to sew up this dressing gown. My daughter and I have been on school holidays. We didn't go away anywhere in particular, but we have had a few outings. Still, there's been time. I've procrastinated like crazy. First, it was because I didn't have the right piping, so I put it off until I could get to Spotlight. They didn't have what I was looking for, then neither did Lincraft. I ended up making my own from my stash (which totally could have been done two weeks ago). The pattern doesn't even call for piping!  I just thought it would look nice.


The only main reason I've pushed through with the dressing gown (and not started another project) is because I badly want to add it to my Project 50 tally. I guess that little goal setting exercise is proving its value.

Now I've got a cuddly dressing gown to see me through this winter, and, hopefully, many more after that. I can't see myself sewing another one anytime soon.

So what did I think of this pattern?


Butterick 5537

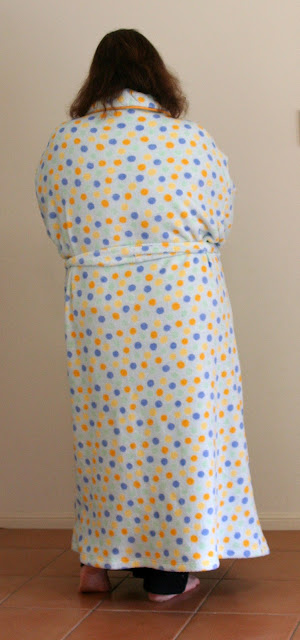
It's not bad, but it just looks sloppy. I guess that's to be expected with an oversize dressing gown made from polar fleece. I made the size that corresponded closest to my measurements and I feel like I'm swimming in it. I had to shorten the sleeves by 19cm. Admittedly, this is partly because I eliminated the cuff, but still - the garment doesn't have a 15cm cuff!

The instructions were good. I followed them loosely, but deviated a little at times. For example, I inserted piping in between the facing and the body of the garment, I left off the pockets, I did a Hong Kong binding on the edge of the facing (turning it under 1/4" and topstitching just wasn't going to cut it) and I interfaced the hem and sleeve hems before stitching. The instructions for the collar result in a relatively nice finish, the handstitches hiding in the polar fleece nicely.

Overall, I'm sure I'll get plenty of wear out of this dressing gown and I'm glad to have the project finished!


(I even left my hair unbrushed for these photos for the authentic dressing gown experience! LOL)


Next up, a t-shirt for my daughter. She's requested another Farbenmix Quiara shirt with the double sleeves. Pity. I can't use that one for the PR contest either. That's OK. I know what's more important to me.